

Can you encapsulate a crawl space yourself? Sometimes a small, dry space needs straightforward cleanup and a carefully installed ground vapor barrier. But a liner is not a repair for standing water, a leaking pipe, unstable framing, or an unexplained moisture source. In DC, Maryland, and Northern Virginia, the useful first question is not “Which plastic should I buy?” It is “Where is the water coming from?”
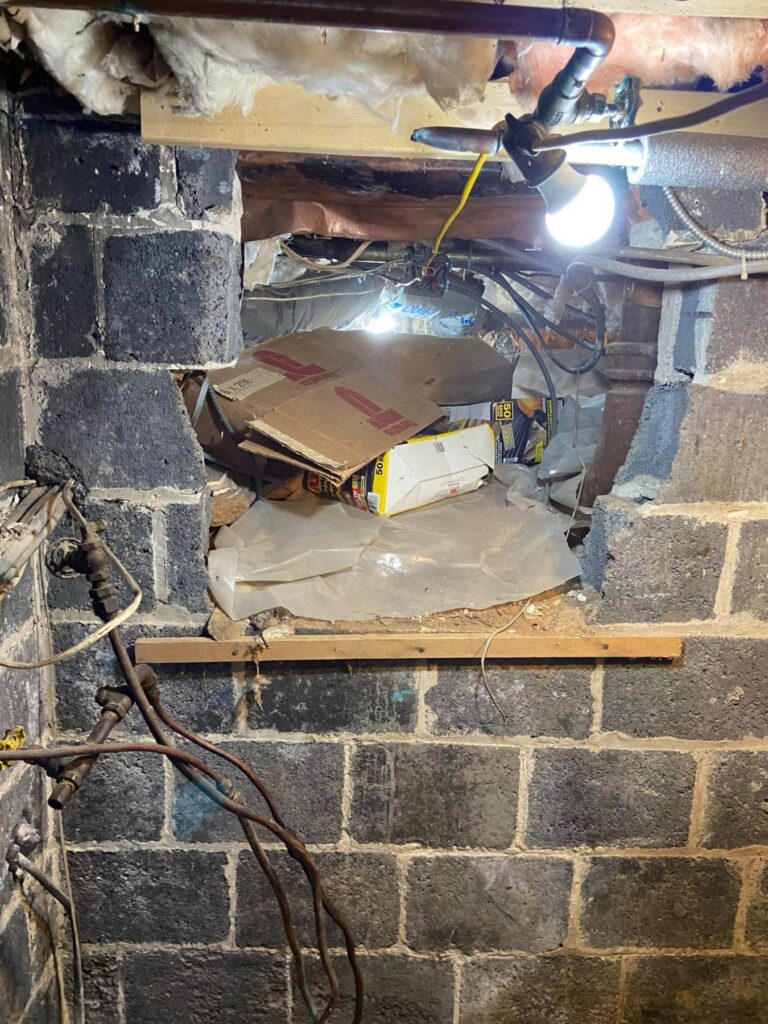
Field photo: an unsealed block-wall opening in a separate crawl space. It illustrates why the existing conditions need inspection; it is not evidence of the conditions in your home.
What should you check before buying a vapor barrier?
Visit the space after rain, if it is safe to enter. Look for puddles, damp soil, water marks on foundation walls, wet insulation, plumbing leaks, disconnected downspouts, and grading that directs runoff toward the house. Note whether moisture appears only after storms or persists during dry weather. A musty smell can signal moisture, but it does not identify the source by itself.
If you see active water, stop there. Covering wet soil or walls can hide a problem without correcting its path. Depending on the diagnosis, the work may start outside with downspout discharge or grading, or inside with a drain and sump system. Read our crawl space waterproofing guide for the difference between liquid-water control and humidity control.
When is a DIY approach reasonable?
For an accessible crawl space that is dry, structurally sound, and free of electrical, plumbing, and pest concerns, a homeowner may be able to remove debris and improve a basic ground vapor barrier. The liner should cover the exposed soil and be detailed around piers and other interruptions so it does not simply shift or leave wide gaps. Material choice, fastening, and seams depend on the site; a roll of plastic laid loosely over dirt is not a complete encapsulation system.
Document conditions before and after the work. If water appears later, do not assume the liner has failed; recheck the source and the drainage path. A dehumidifier can help manage humid air, but it cannot substitute for fixing bulk-water entry.
When should you call a professional instead?
- Standing water or recurring wet soil: The water source and a safe discharge route need to be identified before covering the floor.
- Rot, sagging floors, or damaged supports: These require evaluation of the structure, not just moisture-control materials.
- Plumbing or electrical defects: Have the appropriate trade address those hazards first.
- Suspected mold or extensive damaged insulation: Disturbing contaminated materials without a plan can spread debris and does not solve the underlying moisture problem.
- Very tight or unsafe access: Do not enter a space where you cannot work and exit safely.
Professional work is not automatically “encapsulate everything.” A good proposal should explain the observed source, whether liquid water is present, why each component is needed, and where collected water will go. A dry space may need much less work than a wet one. Conversely, installing a liner while ignoring water running in at the perimeter is an incomplete plan.
What should a crawl space proposal answer?
- What evidence points to the water or humidity source?
- Will runoff, downspouts, or grading be corrected outside first?
- If a drain or sump is proposed, where will it collect and discharge water?
- How will the ground liner be sealed at walls, piers, seams, and penetrations?
- What happens to wet insulation, damaged framing, and existing vents?
- What is included in the written scope and any stated warranty?
The right answer depends on the house, not a one-size-fits-all kit. If your crawl space has recurring water or signs of structural damage, request a crawl space inspection before covering the evidence. For a dry space with a limited vapor issue, a modest, well-documented DIY project may be enough.