

At a Rockville, Maryland home, our crew waterproofed approximately 22 feet of exterior foundation wall beneath a row of basement windows. The window wells and downspout made access more delicate: the buried wall and its wall-to-footing joint had to be exposed before the finished surface could be restored. These real job photos follow the excavation, the exposed wall crack, gray cementitious waterproofing coat, installed sheet membrane, near-grade drainage work, and completed exterior.
Working around the existing basement windows
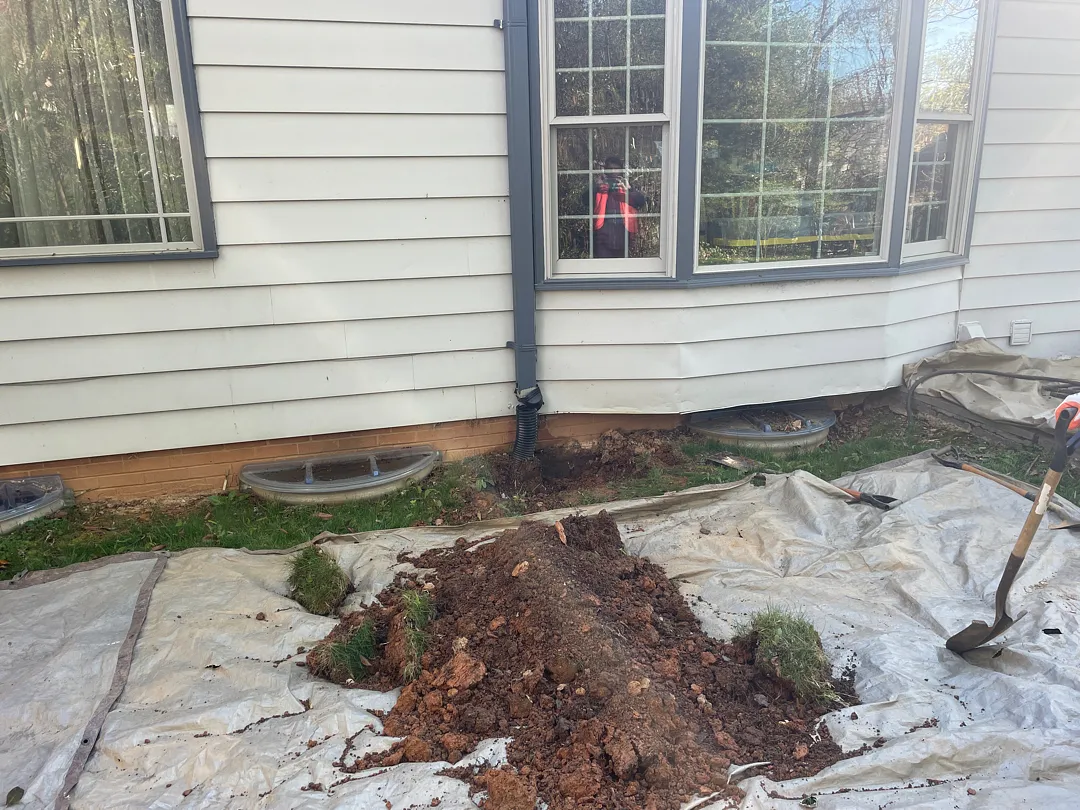
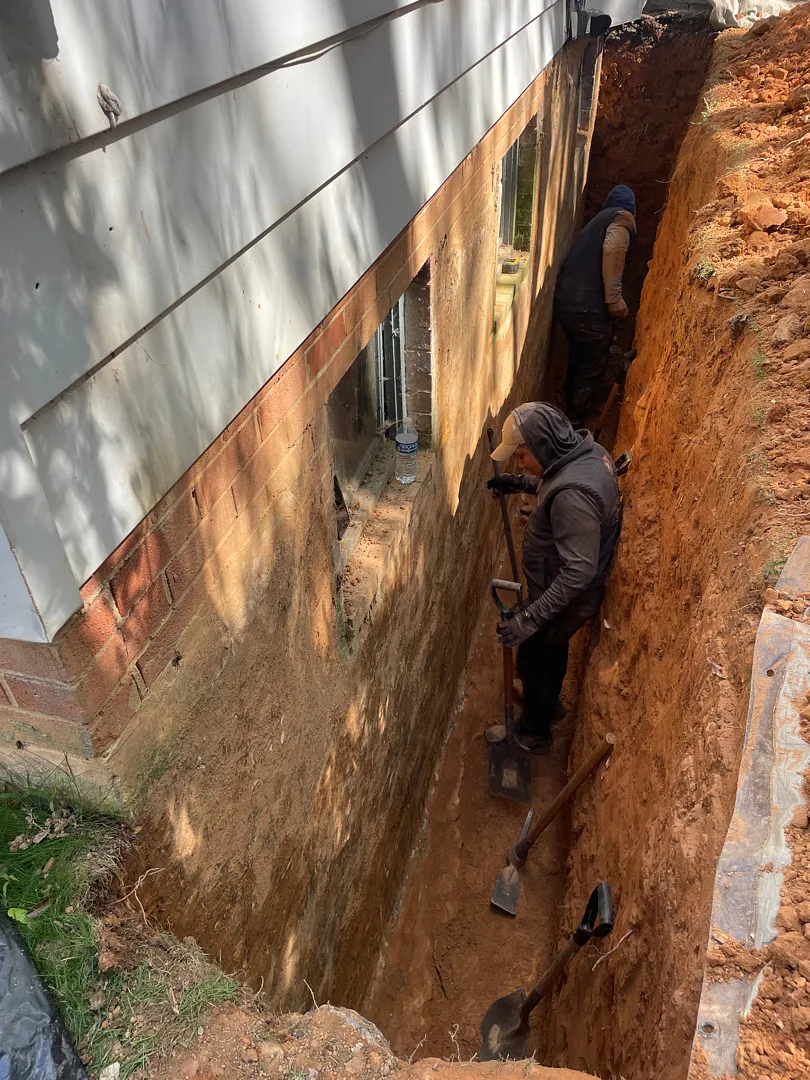
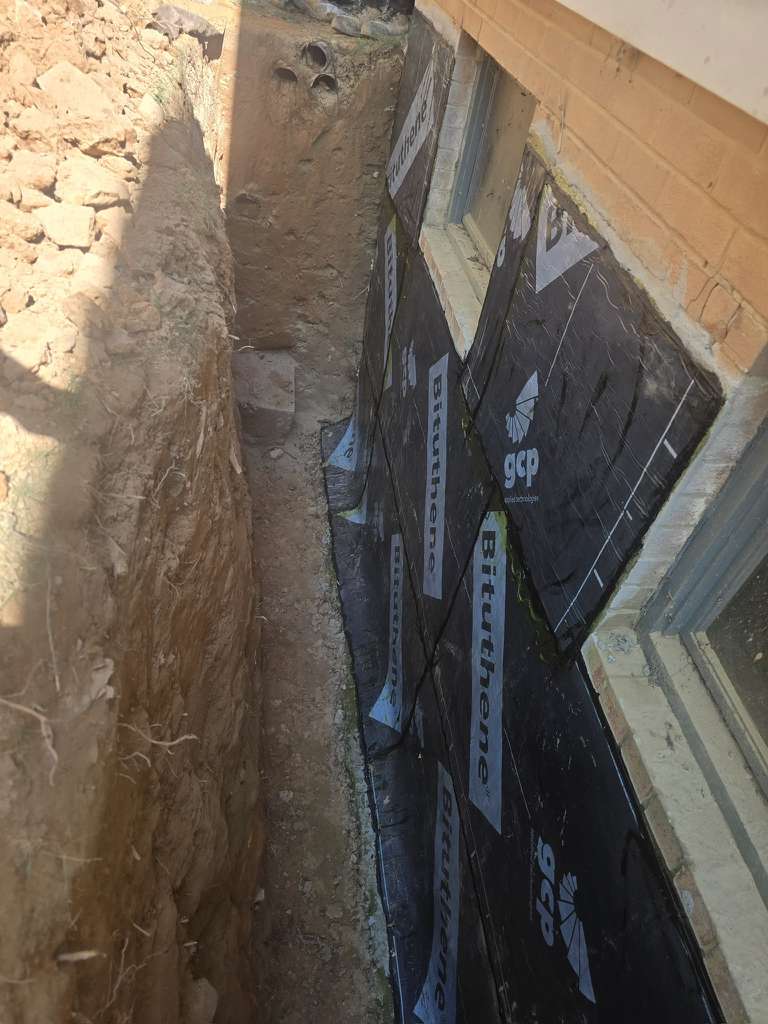
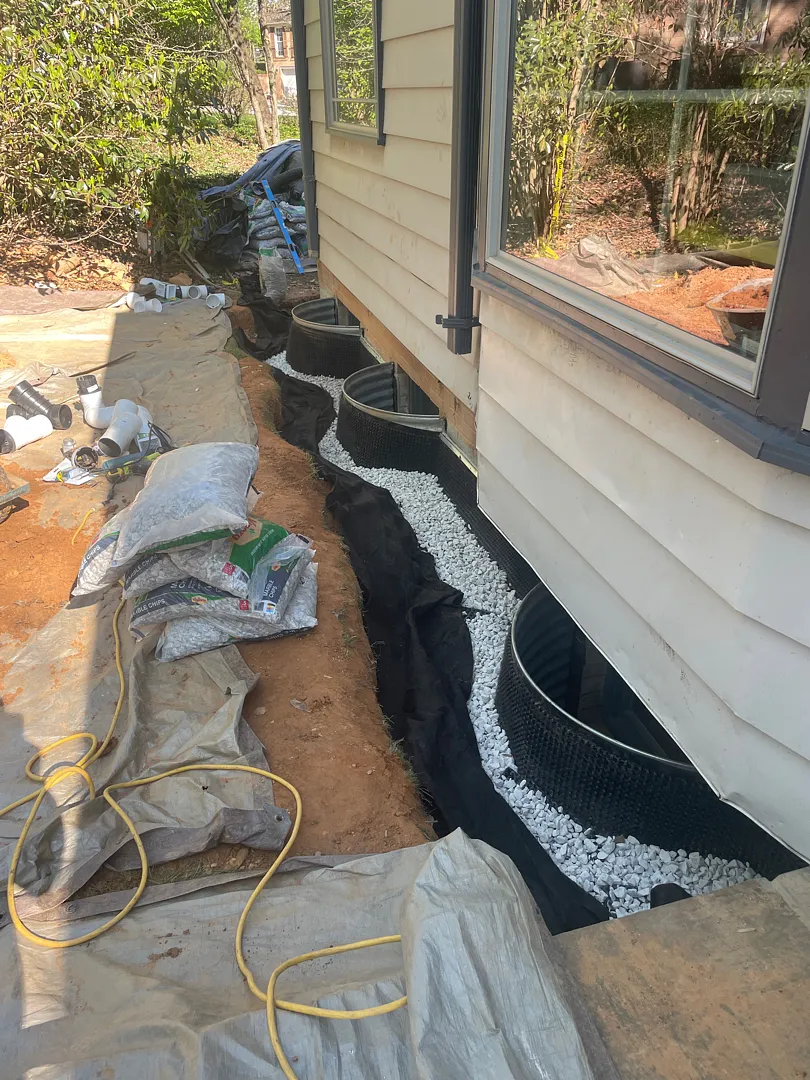
The crew protected the work area and opened a trench along the house, working around the existing window wells and downspout. The excavation extended down the foundation rather than stopping at finished grade. That gave us access to the buried wall face and the cold joint where wall and footing meet. The photographs show how narrow the working corridor was.
Repair the wall before covering it
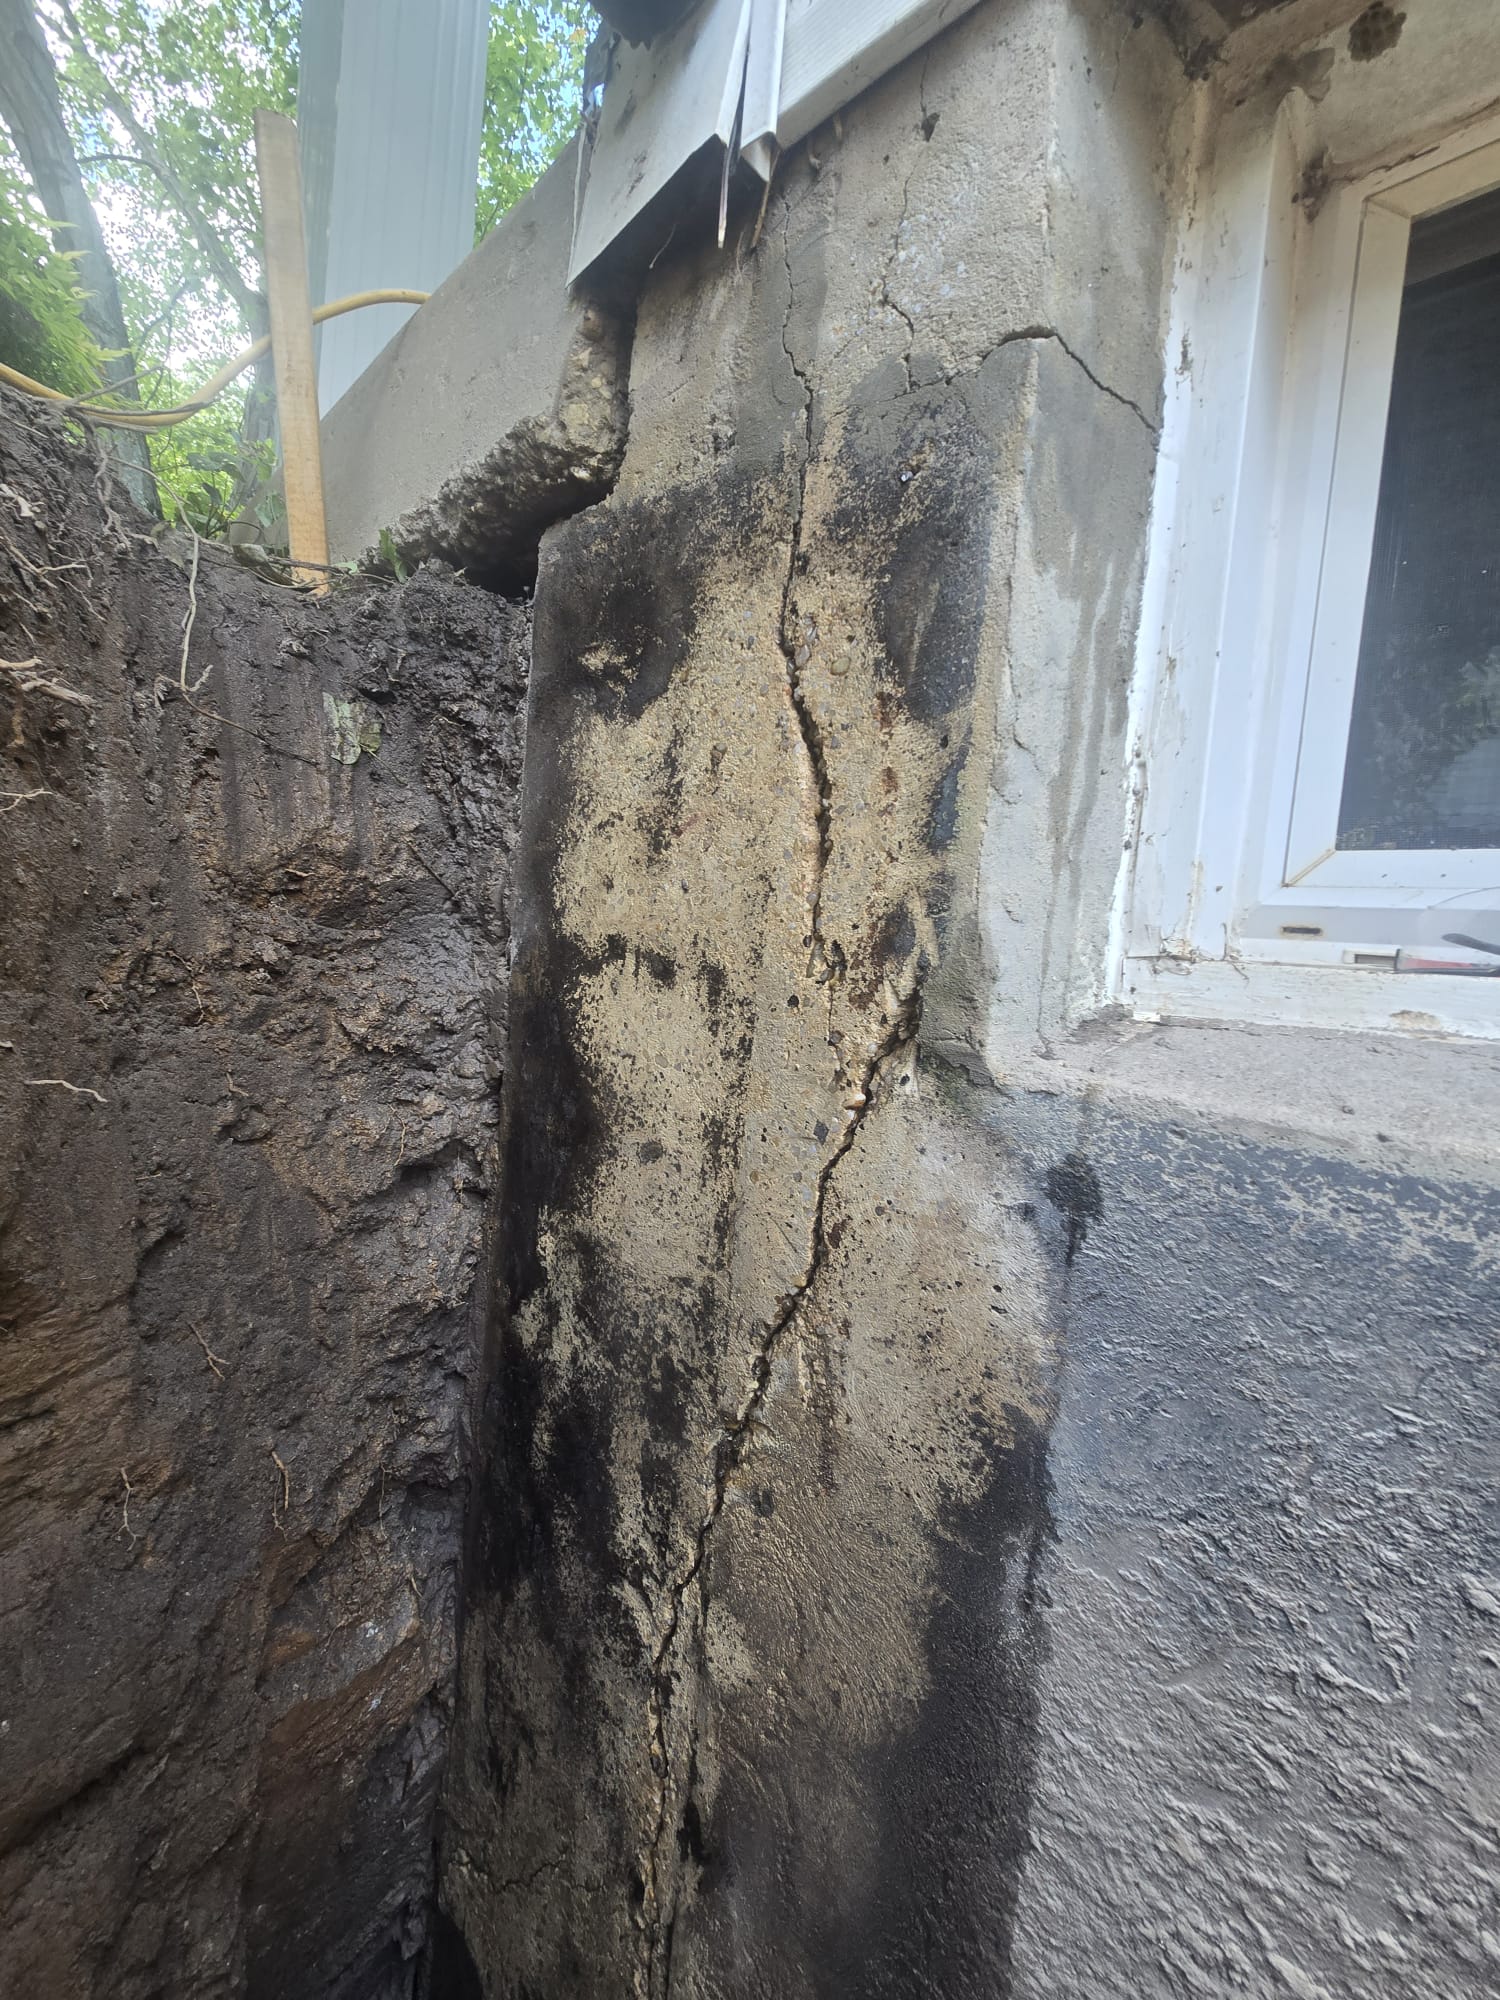
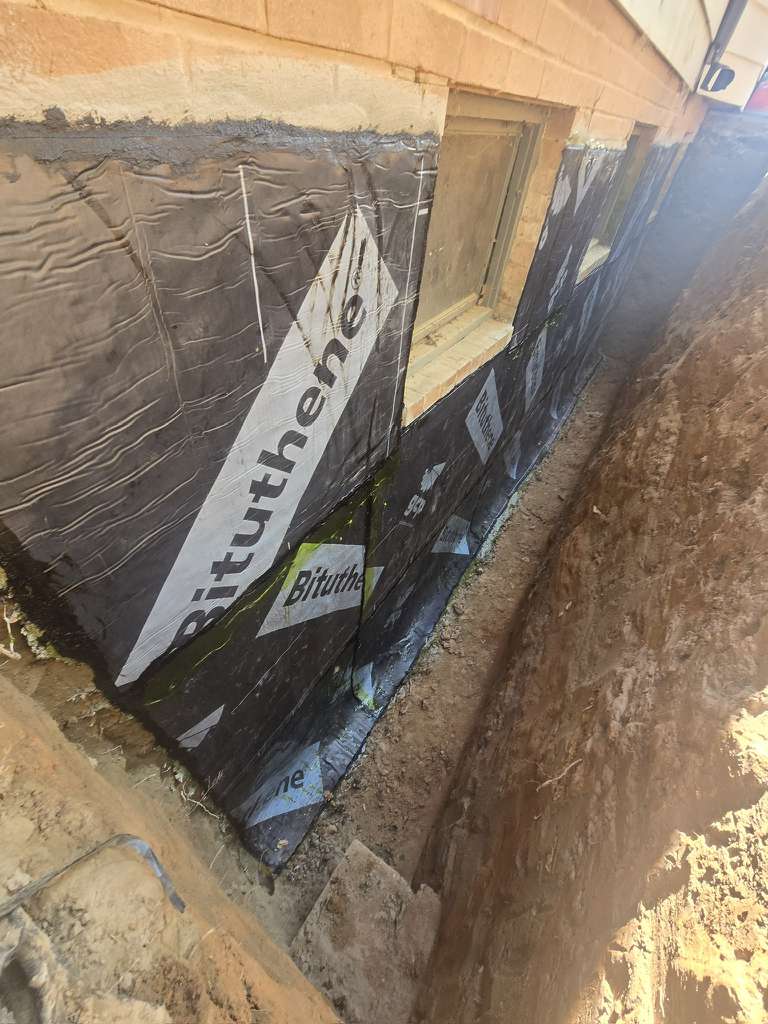
With the wall exposed, a crack beside a basement window was visible before the waterproofing layers went on. The completed scope called for cleaning loose material from the wall, repairing the cold-joint area and cracks with polymer-modified mortar, and then applying a cementitious waterproofing coat. The crack photo documents the starting condition; a separate work photo captures the gray coat being applied. This cementitious layer is distinct from the sheet membrane installed afterward.
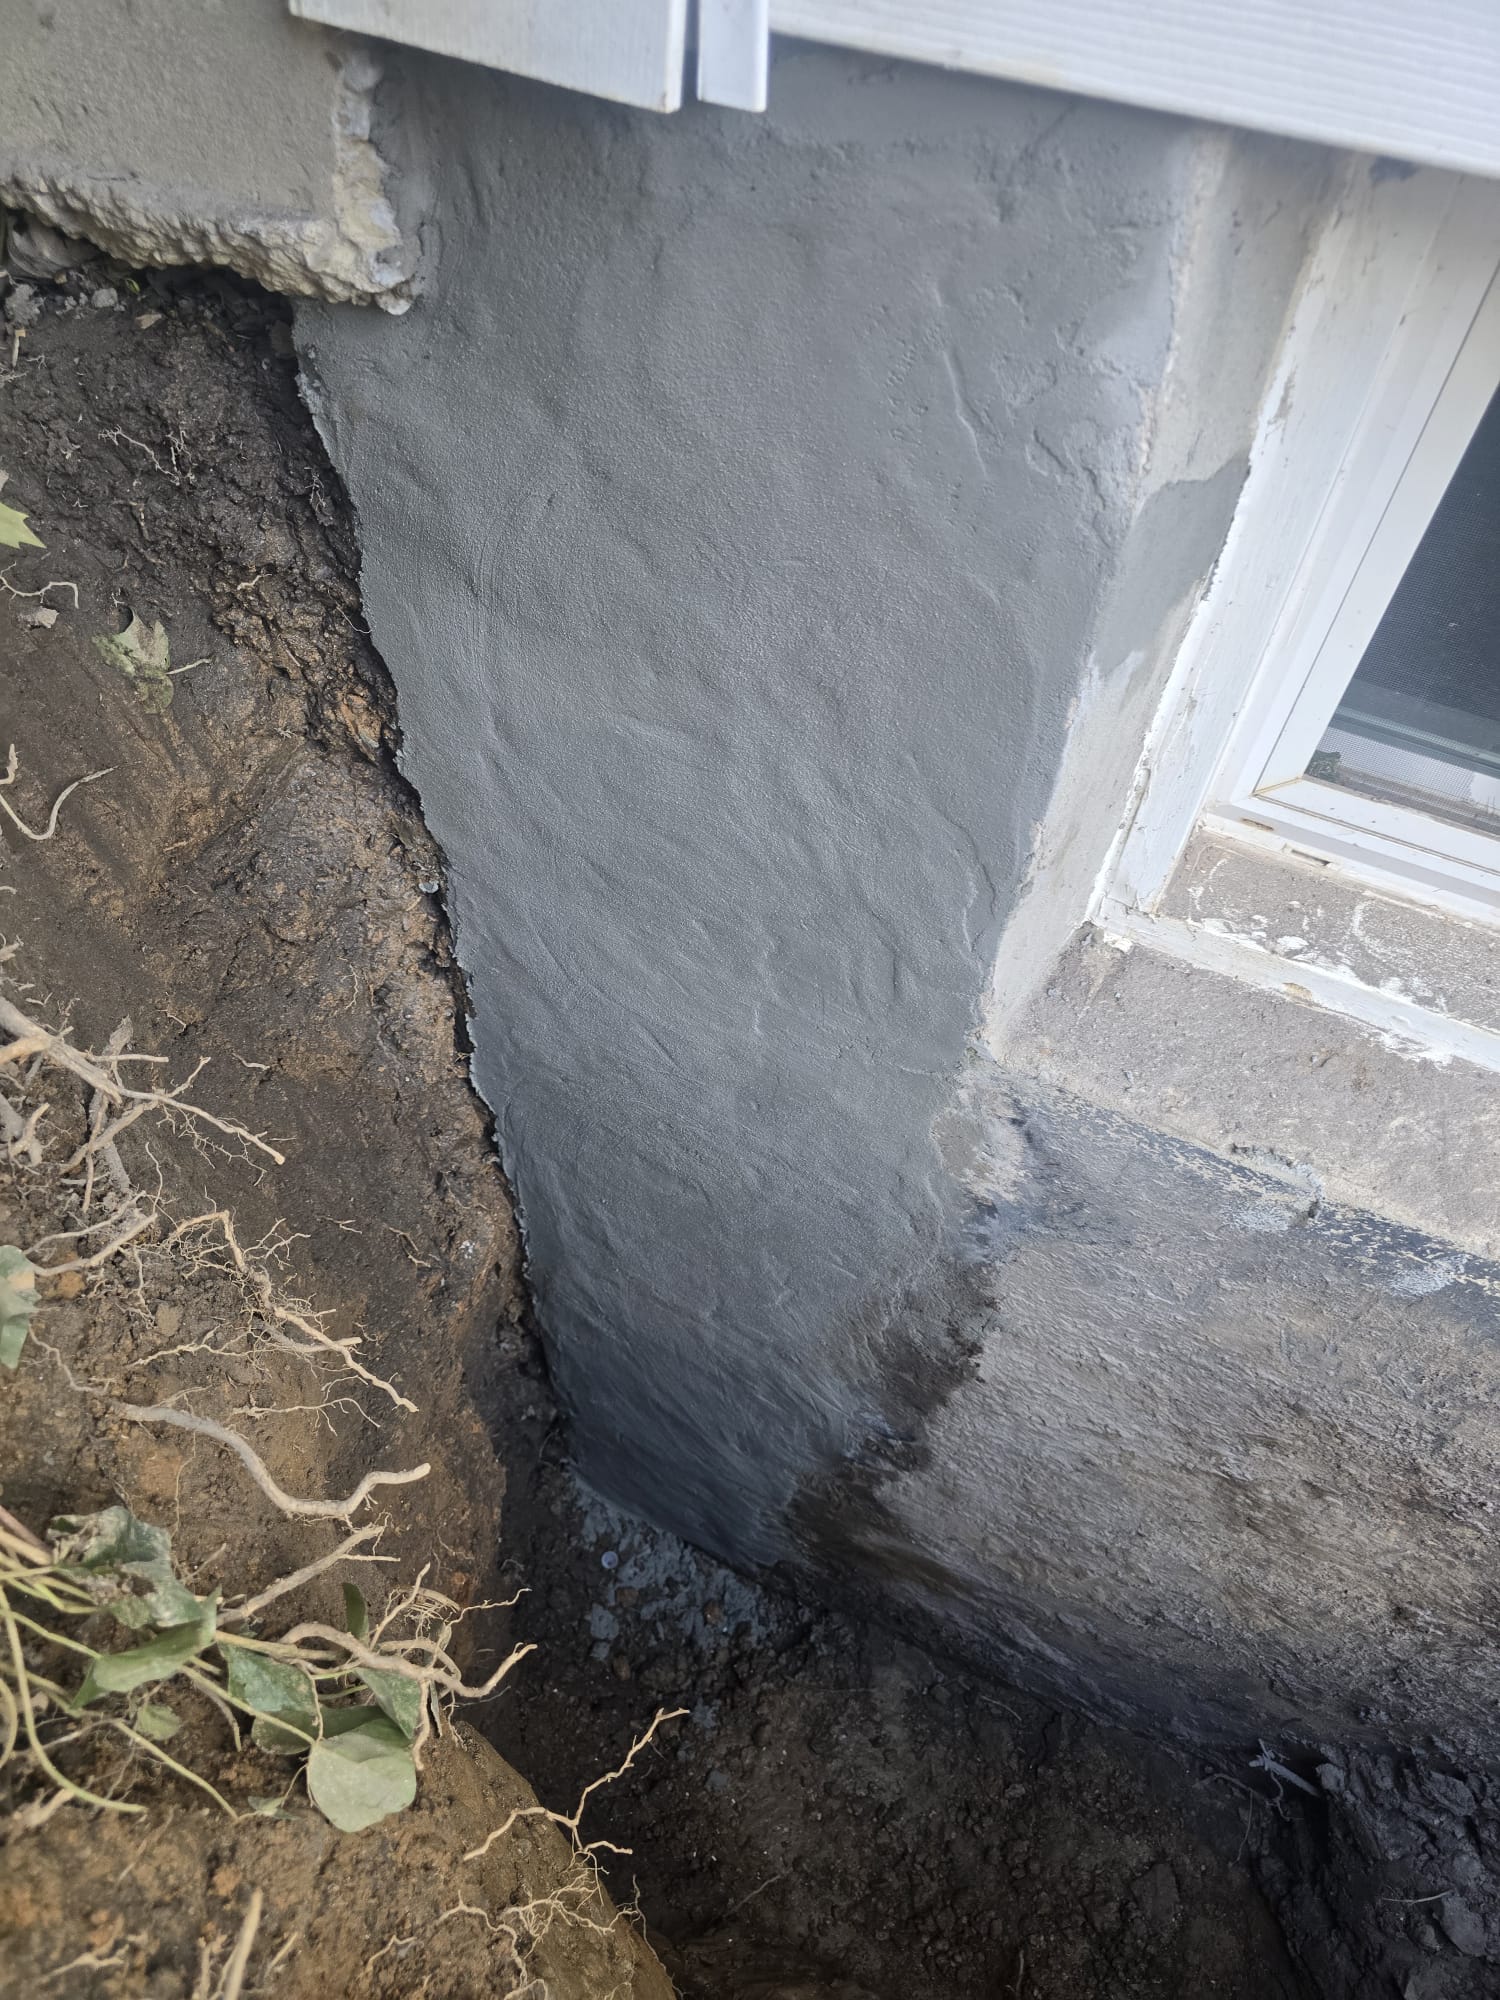
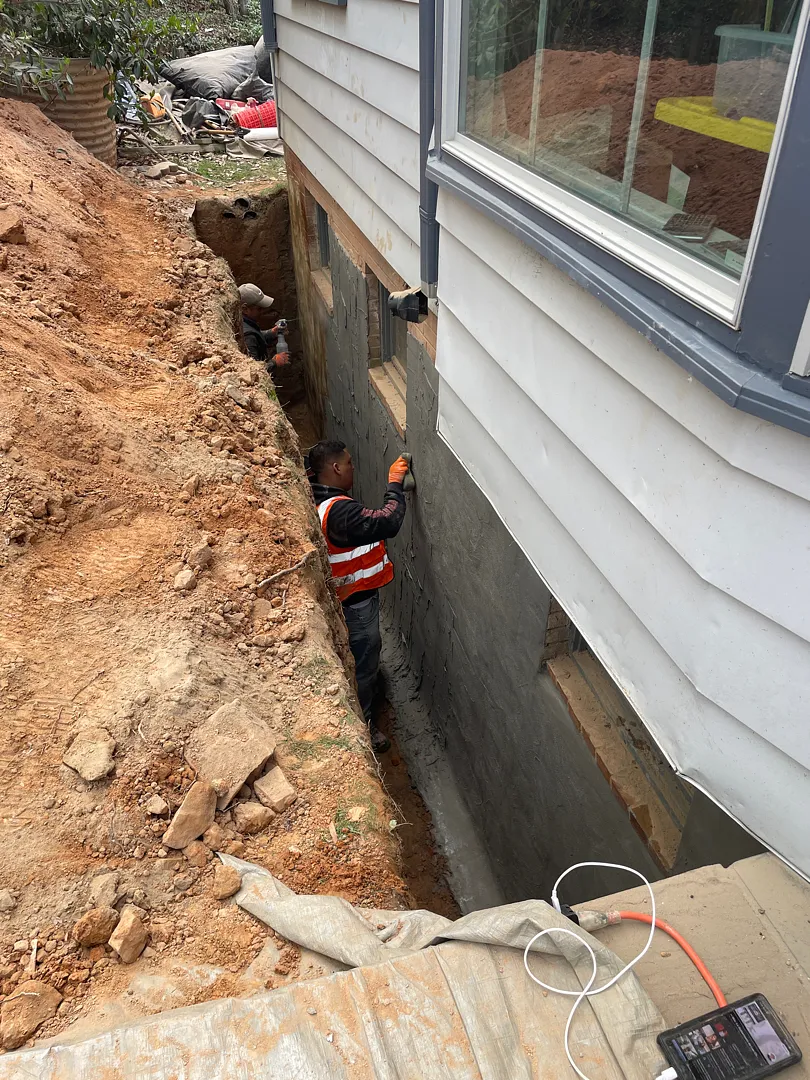
The work order then specifies compatible primer, a self-adhered sheet membrane with overlapped seams, and XPS protection. Each layer serves a purpose: mortar repairs discontinuities, the cementitious coat bonds to the wall, the sheet membrane forms an exterior barrier, and XPS protects that barrier during the remaining work and backfill.
Direct water into the near-grade drainage zone
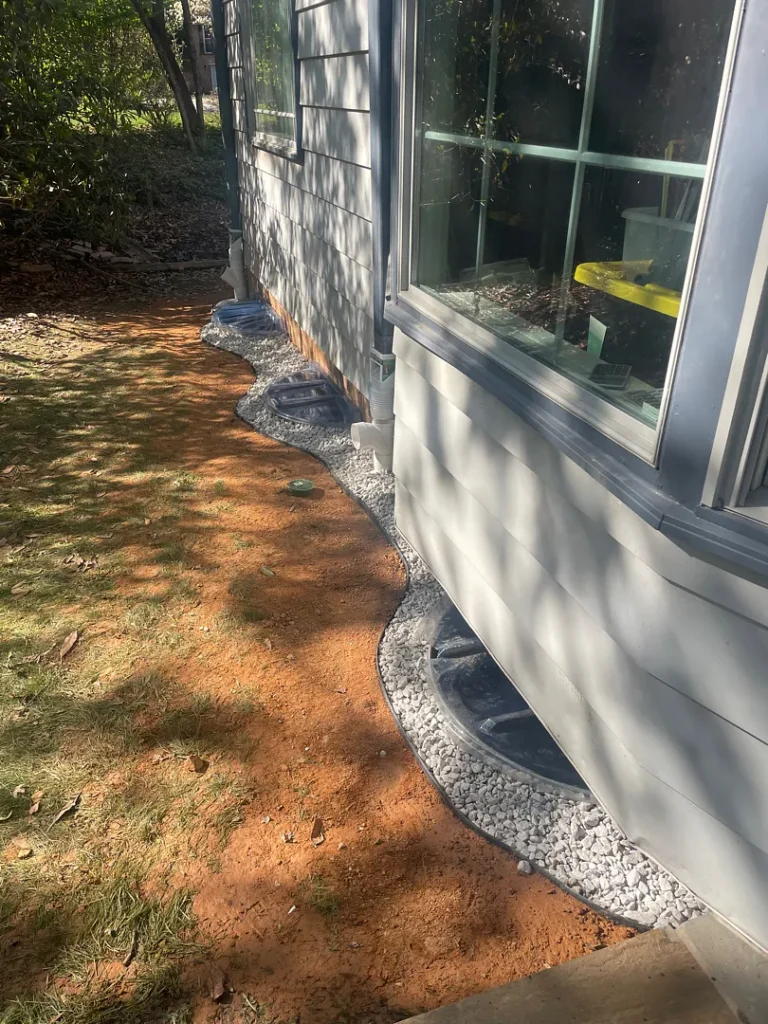
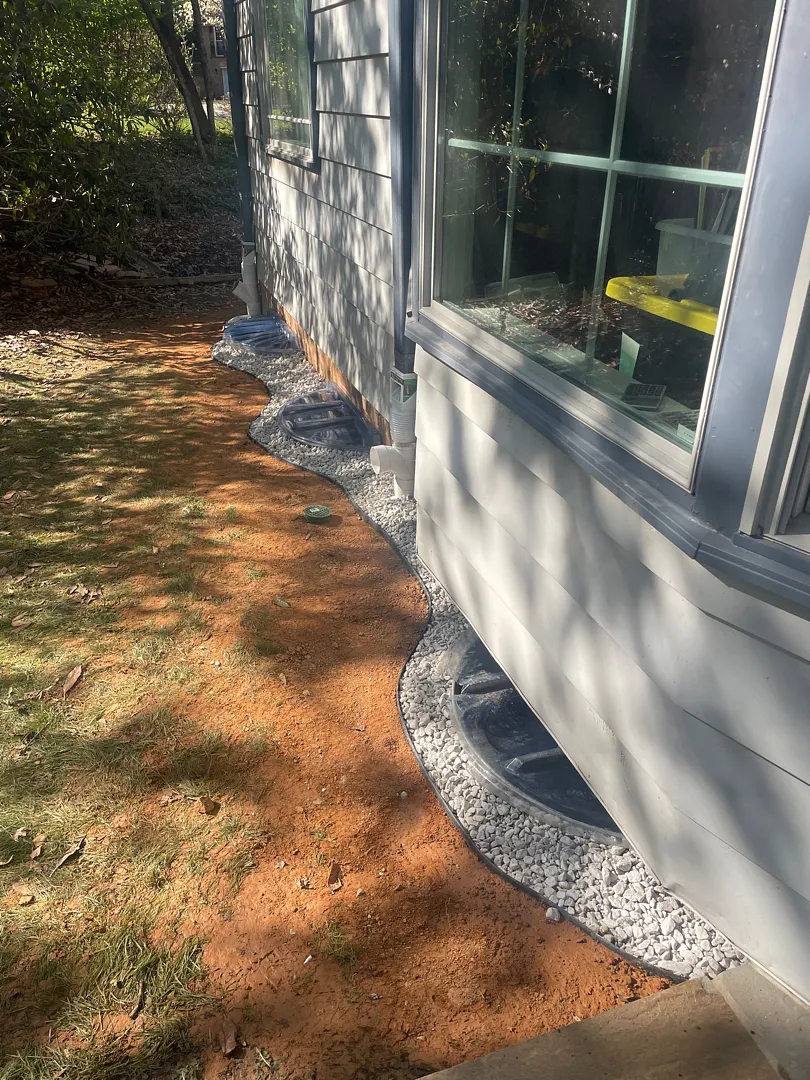
After the wall work, the trench was backfilled in controlled layers. The job photos show a stone-filled band beside the house near finished grade. In the finished view, that gravel edge curves around the basement-window wells. This upper drainage detail is the grading tile portion of the project—an exterior French drain designed for surface water near the house. The deep excavation was needed to waterproof the buried wall; it does not change the level of the visible drainage band.
The finished exterior
The final photos show the excavation closed, soil restored, and a neat stone edge beside the foundation. The visible gravel is the last stage of a project that also treated the buried wall and its joint below.
Questions homeowners ask about work like this
Why dig deeper than the finished gravel band?
The deep excavation gave the crew access to the buried wall, cracks, and wall-to-footing joint for exterior waterproofing. The finished gravel band is part of the upper grading-tile system, which collects water near the surface and guides it toward the drain. Both details matter, but they are separate stages of the job.
Is gravel beside the house enough to waterproof a basement wall?
No. Gravel can help water enter a drainage zone, but it does not seal cracks or the cold joint. This project paired subsurface wall repair, a cementitious coat, primer and sheet membrane with drainage and careful backfill. The right combination depends on the wall and the path water takes.
Does every wet basement need an interior French drain and sump pump?
No. An interior system fits some water paths, but it is not the automatic answer to a problem on the outside of a foundation wall. This Rockville scope treated the wall from the exterior. The choice for another home should follow inspection of where water enters, foundation construction, site grading, and the available discharge route.
If you are comparing options for a Rockville basement, see how our exterior waterproofing service works or schedule an inspection. The first step is to identify the water path before selecting a system.